FaceFusion is an open-source AI model for face swapper & enhancer for images and videos.
Although it’s completely free, it still needs coding skills to install and use it.
It’s not very user friendly for a person without any coding skills like me.
Therefore, after searching and trying out many tutorials online, I summarize this step-by-step Guide for beginners on how to run Facefusion model on your computer.
No coding skills needed, no need to install python or set up the virtual environment.
Let’s get started.
How to Install FaceFusion on your computer without coding?
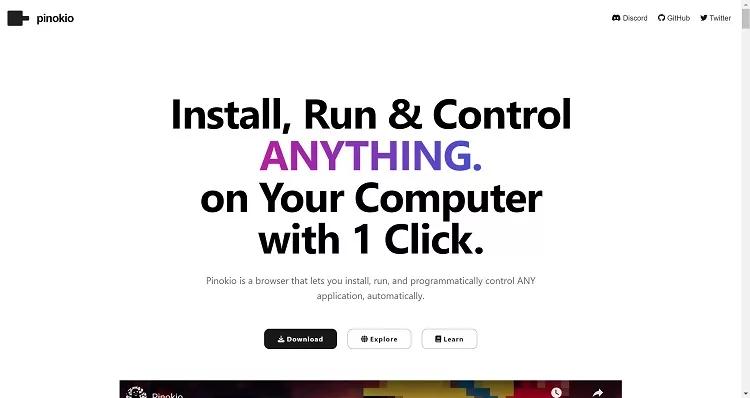
Instead of visiting Github page of FaceFusion and don’t know how to get started, we’re going to use Pinokio.
Pinokio is a platform that integrates a vast amount of open-source software. Here, you can freely download and use them:
Once the download is complete, proceed with the installation with default settings.
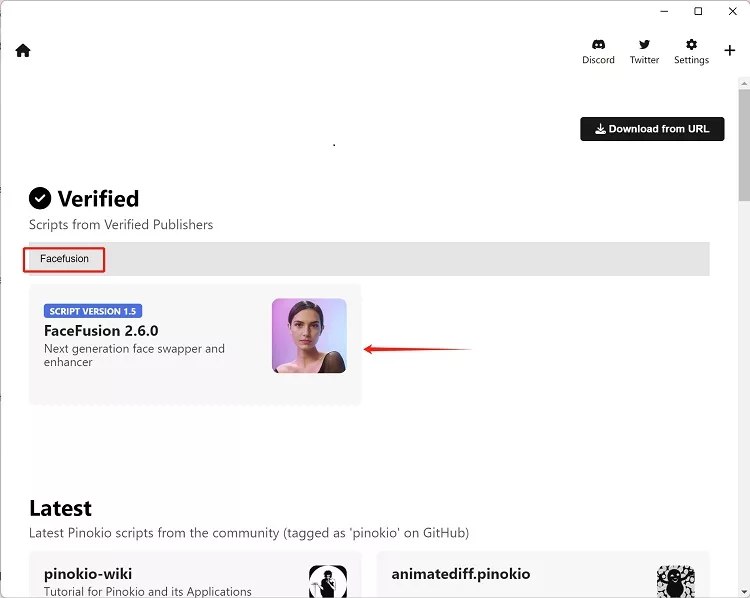
After installation, open Pinokio, and in the Discover page, search for Facefusion. Once opened, click on “Download“.

After the download is finished, click on the image on the homepage to open it.
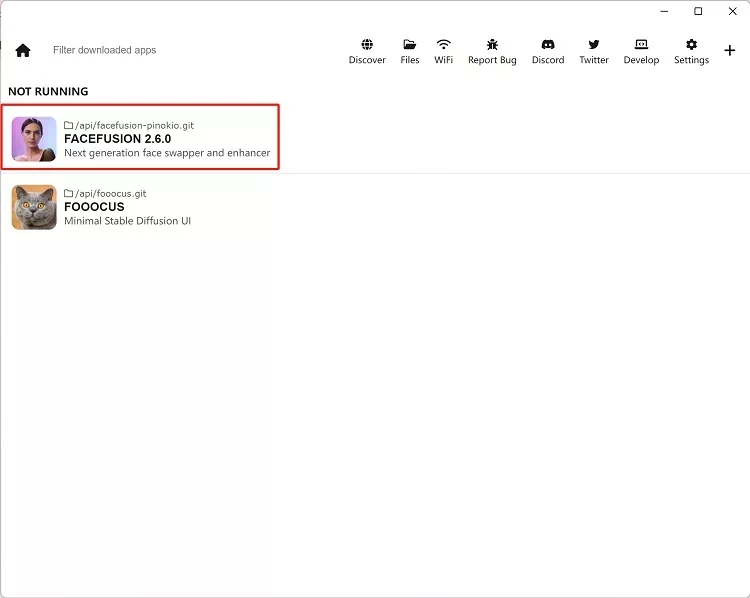
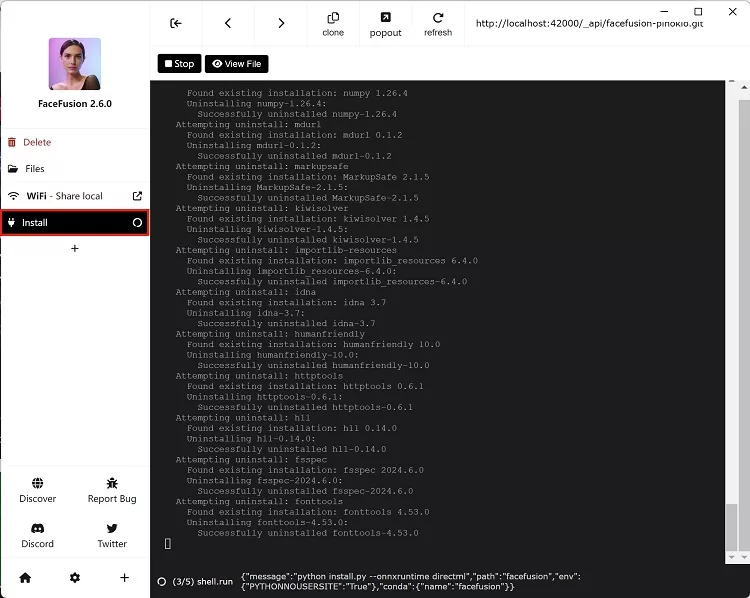
Then, click on ‘install‘ on the left side, and you can wait for it to download and install. The installation process may take some time, depending on your network and computer configuration. Once the installation is complete, there will be a notification on your interface.
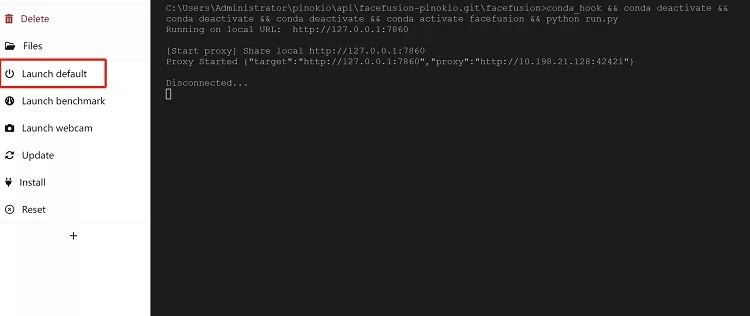
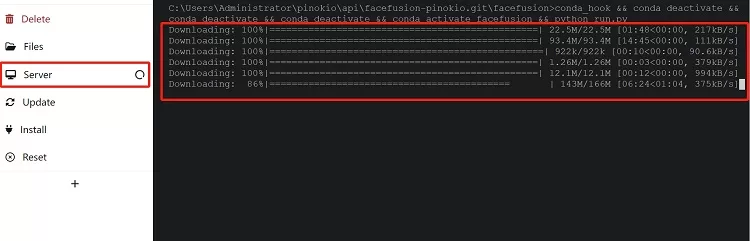
Congratulations on completing the installation! If you are using it for the first time, click on ‘launch default‘, and then wait for further download and initialization.
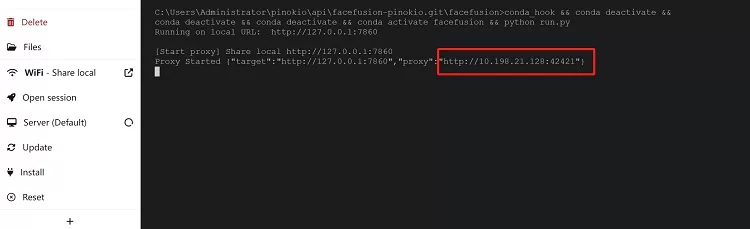
After the initialization is complete, the interface will generate a web link. Clicking on it will take you to the FaceFusion face-swapping page to start face-swapping!
If you want to stop using it, remember to click “Stop” and close the Pinokio app.

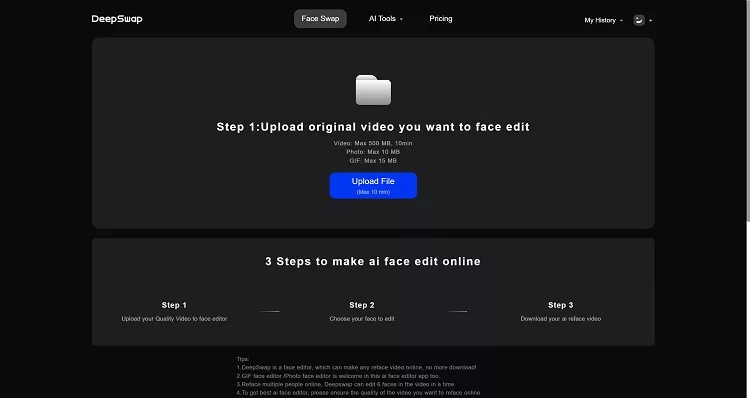
How to use FaceFusion? A step-by-step Guide
(1) Step One: For Casual User
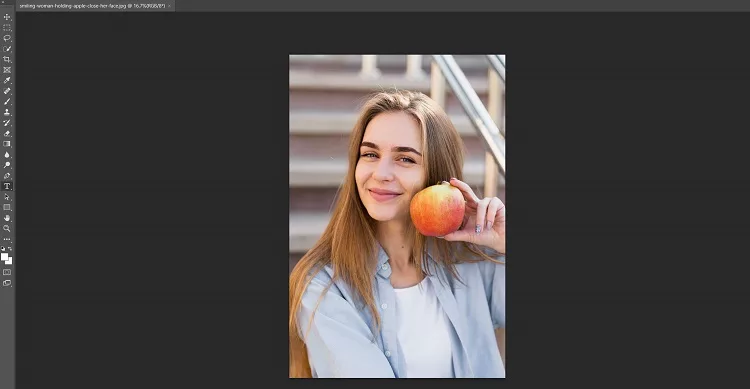
If you’re a casual user, you can have a decent face swap without changing any settings. I think the default settings can satisfy the basic needs for casual users.You can upload the source face on the “Source” section, meaning the photo of the face you want to swap.
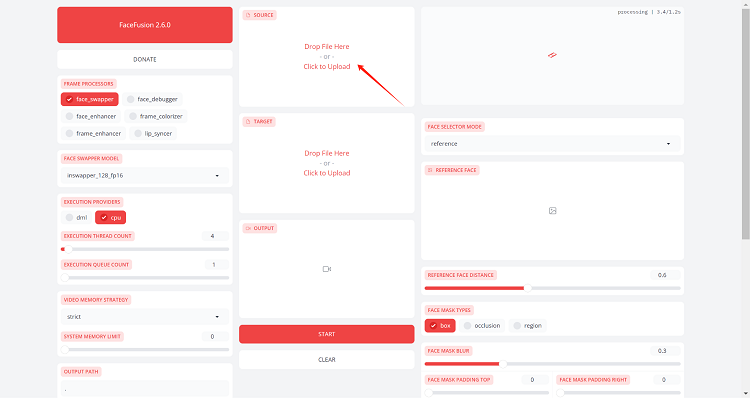
At the “Target” section, you can upload the original image or video that you want to swap the face.
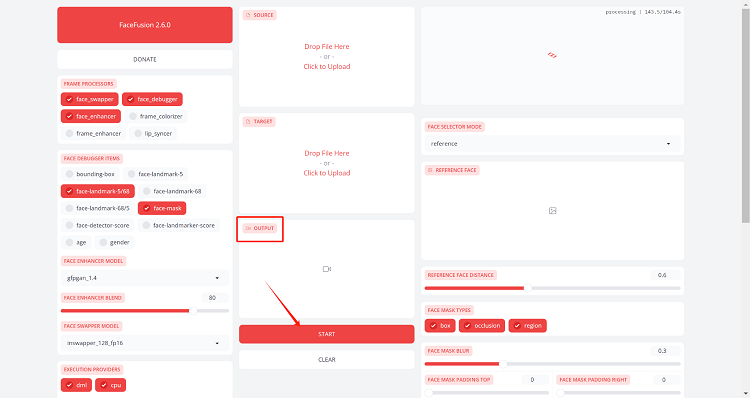
And just click on the “Start” button, you will be able to download the output once it is finished swapping.
(2) Step Two: The Preview Section
But if you want to explore further settings, we can run down some of the main settings together now.
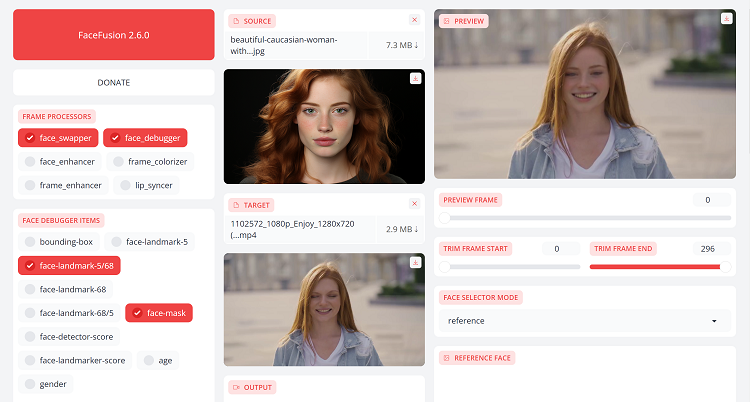
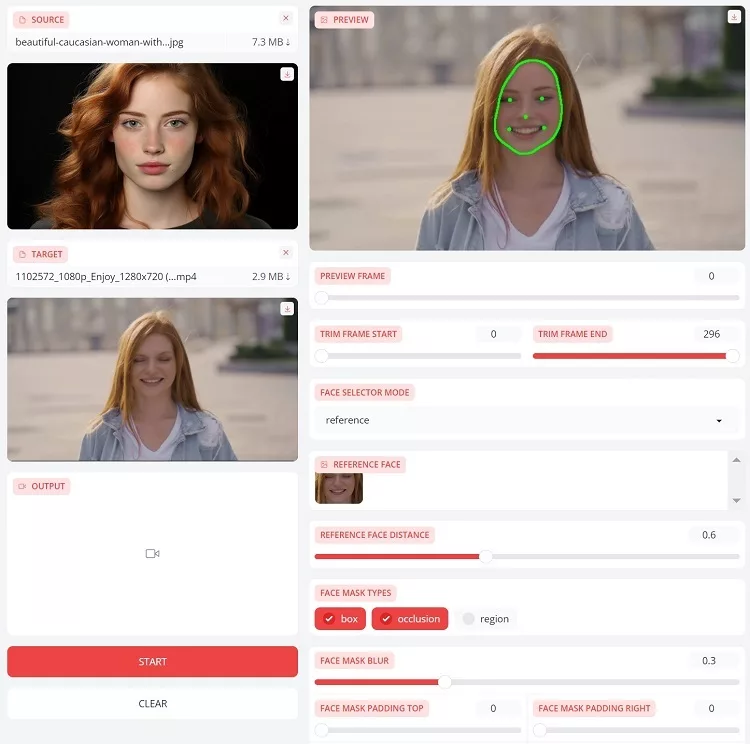
You can check the “Preview” section to preview the effect of output by frame.
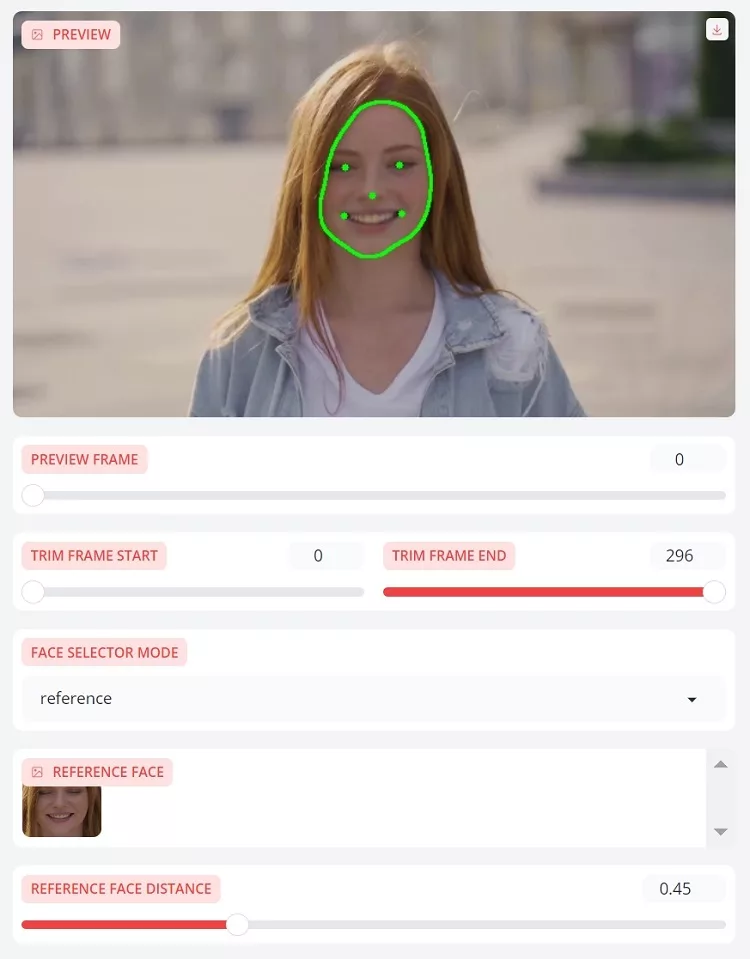
“The Preview Frame“: It simply means which frame you want to preview. It’s like a video you can switch into a specific frame.
“Trim Frame Start” and “Trim Frame End”: You can set the starting and ending frame you want to preview.
The”FACE SELECTOR MODE” and “REFERENCE FACE“: It uses the AI model to detect the face on your uploaded images/ videos and give you a reference of what face is going to be swapped.
If there are many people on one frame, there will be many reference faces.
One main problem is that you cannot choose which face to be swapped if there are many of them.
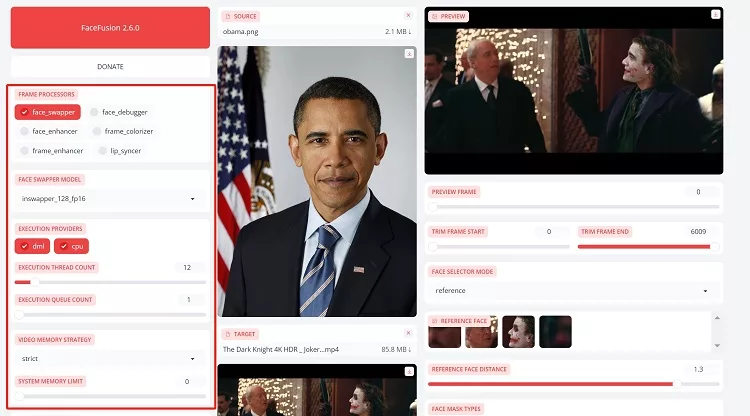
(You can see two faces are all swapped into Obama’s face)
The options where you can choose between “Many”, “One” and “Reference” seem pointless.
REFERENCE FACE DISTANCE: It shows how similar the reference face is to your source image. But it’s just for your reference.
The “FACE ANALYSER” would help you to choose the order of face detection on each frame. You may choose the direction (from left to right) or the quality (from worst to best).

You may also choose the “AGE” and”GENDER” analyzer if you have such requirements.
And for the FACE DETECTOR MODEL, well from my experience, I think it’s better to set it as default.
(3) Step Three: More Basic Operation Settings
Now if you are unsatisfied with output, you may explore more options and change the very basic settings on the left.

Let’s check the Execution part first.
EXECUTION PROVIDER: Just remember to include both CPU and the other option depending on your device. If you’re using a Mac, make sure you select core ml. If you’re using Nvidia GPU, make sure you select Cuda as well. If you’re on an AMD GPU machine, make sure you have the relative option selected.
Execution Thread account: I actually don’t know what it means. But it seems to depend on your own CPU storage. For example, if you have 16GB you can go with 32 threads.
EXECUTION QUEUE COUNT, VIDEO MEMORY STRATEGY AND SYSTEM MEMORY LIMIT can be kept as default.
The memory setting will use as much memory as it can otherwise if you need a certain amount of memory available for other tasks on your computer you can change it to suit your needs.
(4) Step Four: Advanced Settings
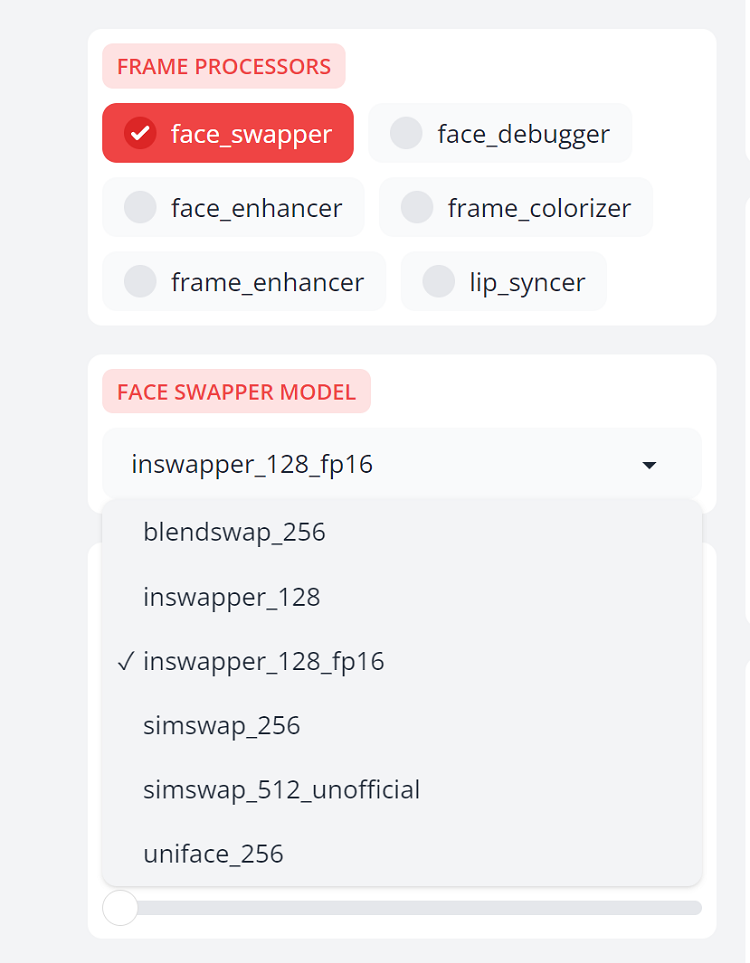
Now, let’s go back to the Frame processors.
First of all, FaceFusion automatically helps you select the “face_swapper” as it’s the main function. For the Swapper Model you can choose 5 other models.
But like I said, most of the best settings of FaceFusion are defaults.
Let’s look at the effect of this model.
The original photo and video:

The face swap effect of inswapper_128_fp16 model:

You may wonder why the hell the resolution is lower than the original video. Actually, that’s one main problem of FaceFusion.
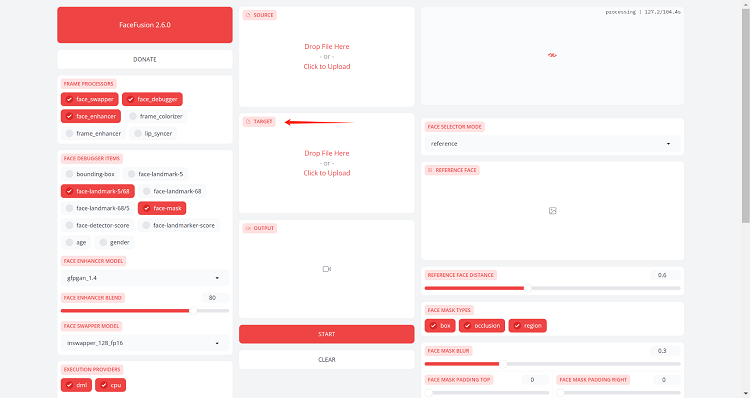
You have to download another “face_enhancer”model to “enhance” the quality of the output.
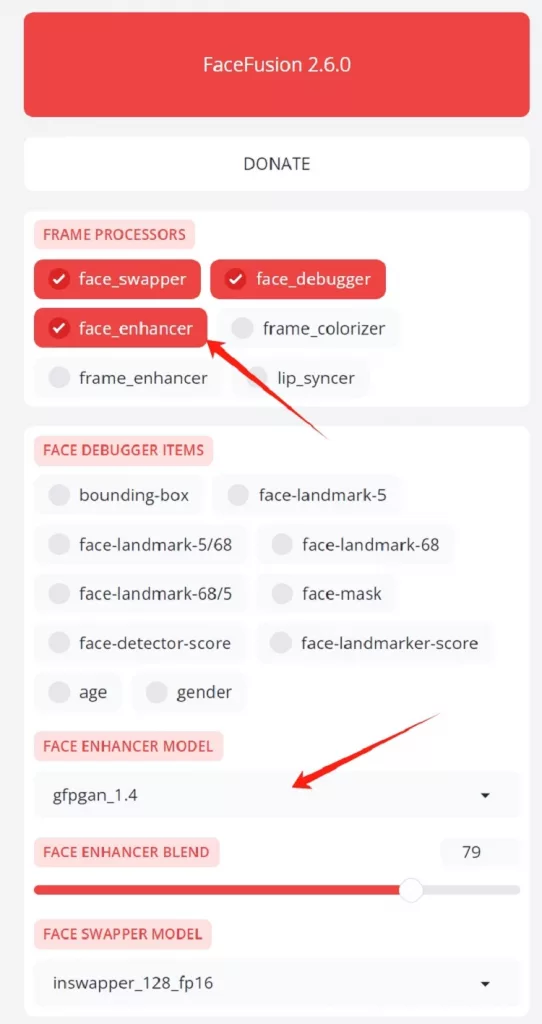
(But I just think it should be essential and necessary to at least keep the same level of resolution.)
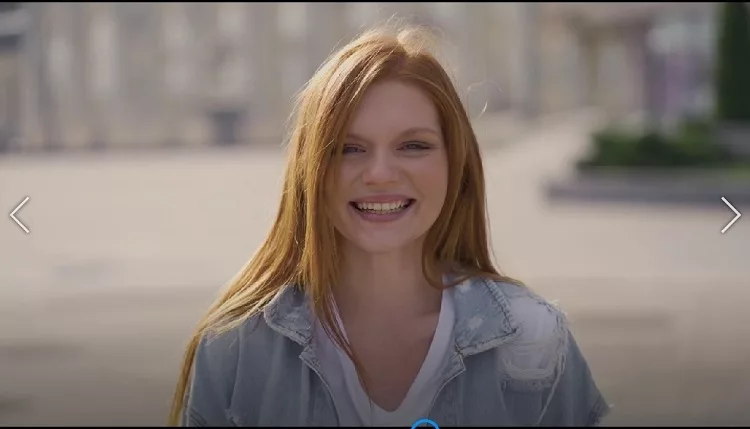
After enhancement model with high resolution:
“face_debugger” model helps you control the effect area. After clicking it, there will be some options down below.
For example, the “face mask” will give you a box to control the effect area.
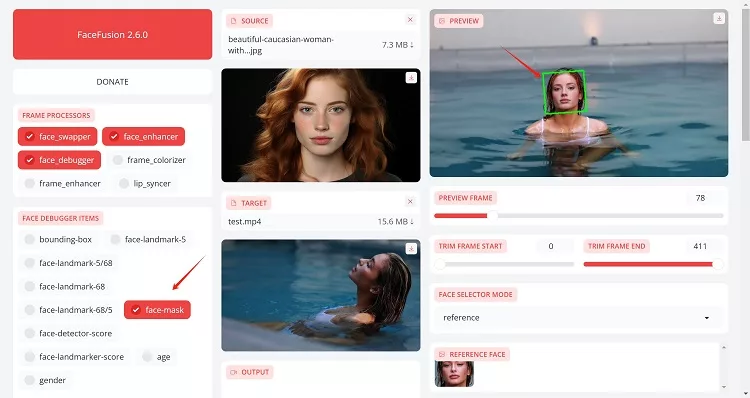
You may also change the type and position of this face-mask green box on the far right to control the effect area of face swapping.
(I really don’t understand why they are put so far away on the right. It’s so confusing.)

The ‘landmarks’ are some precise dots located on the character’s face.

You may also click the “occlusion” and “region” on Face Mask Types and basically the effect area will be located more precisely on the swapping face.
Many face swap models will have occlusion problems. But the ‘face_debugger’ with more precise ‘occlusion’ option can solve this problem (although there are still some flaws).
Before choosing ‘occlusion’:
After choosing ‘occlusion’:

The other models like ‘frame_colorizer’ and ‘frame_enhancer’ are image/video optimizers. The ‘lip_syncer model’ will bring your photo characters alive by letting them be able to talk with your uploaded voice.
Other options:

Keep FPS: The output will be the same frame rate as your input instead of converting it into default rate.
Keep Temp: It will make it so that all of the images created for each output before it merges will be kept in the default folder therefore no longer temporary.
Skip audio: No audio output.
Skip-download: Do not download any model before using it. I don’t recommend you to choose it.
Intriguing New Features of FaceFusion 3.0.0
Version 3.0.0 of FaceFusion has announced some intriguing new features.
Here are some of my favorite ones:
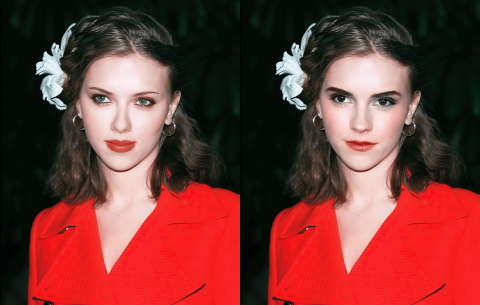
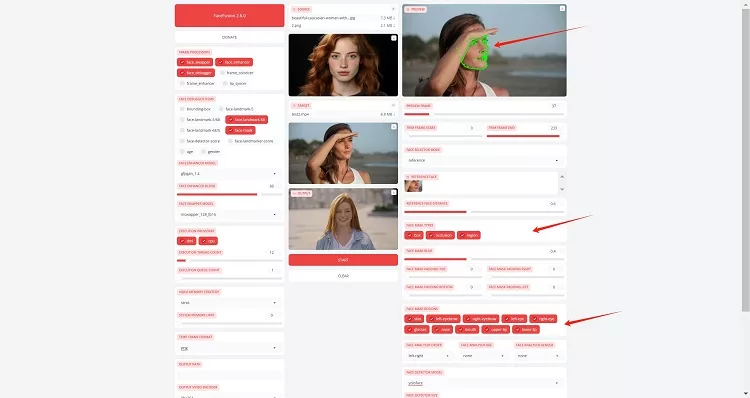
(1) More Natural Light & Expression with Higher Resolution after face swapping
Compared to the previous version, when you choose face swap and face enhancer, the new version significantly improves lighting, expression naturalness, and clarity.
Except for a few minor flaws, it’s almost impossible to tell that the person has been face swapped.

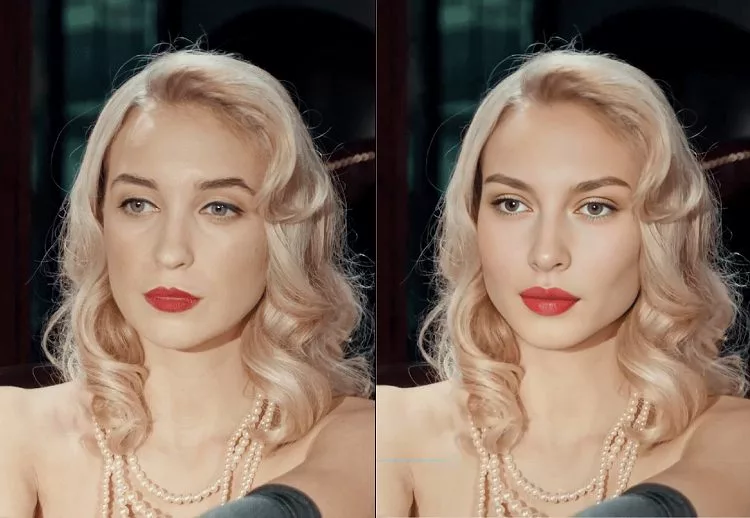
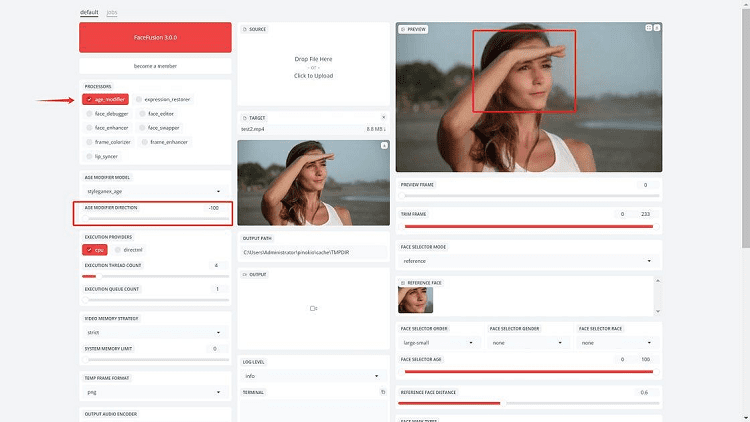
(2) Age Modifier
The new version offers an age modifier that allows you to change the age of the person in the target image or video.
*Tip: It’s not recommended to perform face swapping and age modification simultaneously, as it may cause errors.
If you want to change the age of the person after face swapping, it’s best to first complete the face swap, then upload the result as the target and perform the age modification.
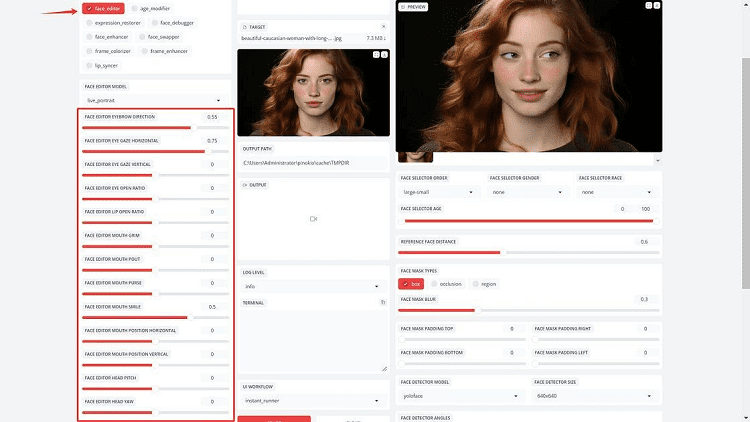
(3) Expression and Head Adjustment
In the new version, you can also adjust facial expressions and head movements in Facefusion.
Using the face editor model, you can modify settings such as the direction of the eyes, the size of the eyes’ opening, the mouth’s opening size, the extent of the smile, and the head’s orientation, etc
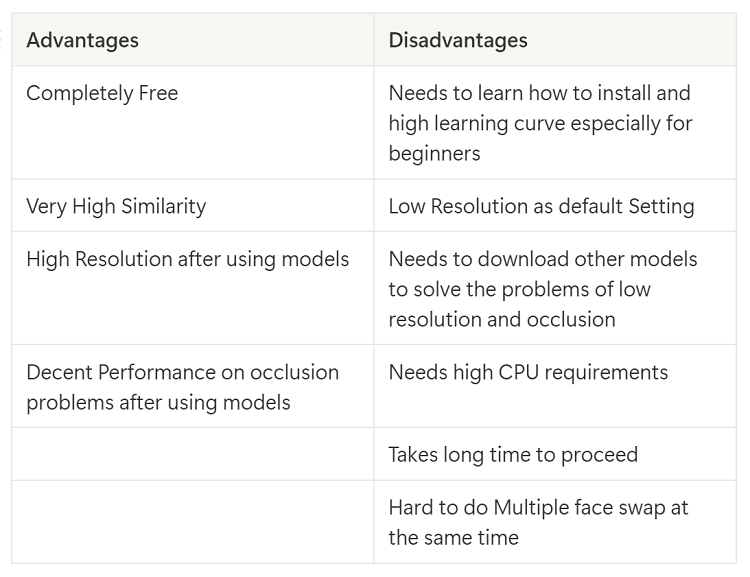
Good and Bad points of FaceFusion
After long-time learning and trial, I may conclude advantages and disadvantages as below:
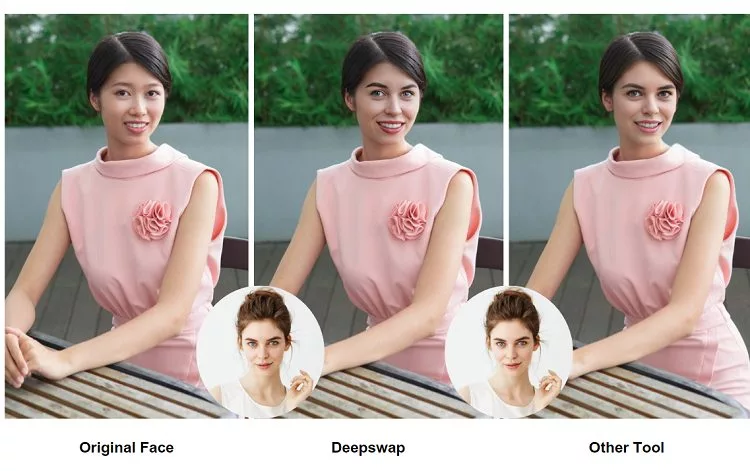
The Best Alternative: Deepswap
If you really don’t want to install and still don’t know how to use it after reading my guide.
Then I recommend you to use Deepswap AI as the best alternative.
Here are a few things Deepswap is better than FaceFusion:
–Use it directly Online: You don’t need to download or install any model. Just go to deepswap.ai, upload your original image/video with your target photo and click to start.
–Super fast: It takes me about 30 minutes to face swap a 1-minute video using FaceFusion on my laptop. However, the Deepswap would only take around a few seconds to handle the same video. And the effect is pretty decent.
-Multiple Face Swap: You can swap different faces with different people at the same time.
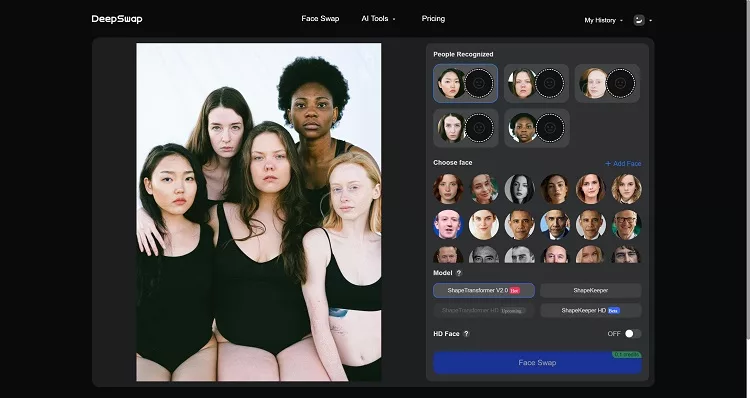
–No Shake, Large Angle and Occlusion Problems: Deepswap has better performance than FaceFusion on these problems.
Effect of Deepswap using ShapeKeeper HD Model:
Final Thoughts
While open-source models are indeed free, the entire process from downloading to installing, configuring, and using them until you’ve mastered it can take a considerable amount of time.
If you’re not familiar with coding and just want to try out the face-swapping feature as an ordinary user, I suggest either following my guide to give it a try yourself, or you might consider spending a little money on a third-party service like Deepswap.